This project is provided by Bernzomatic Torchbearer, Sam Raimondi.
You guys, I am SO excited to not only share an awesome project with you today, but also some really cool news. Remember all of those times I kept promising I’d start working with some fire? Well, the day has come! I have partnered with Bernzomatic as their newest Bernzomatic Torch Bearer! This means I’ll be working with them to create some awesomely cool projects using their torches! First up, a wood burned version of the lawn dice I made for my graduation party! Ready to see how easy it is to torch your wood? Let’s go!
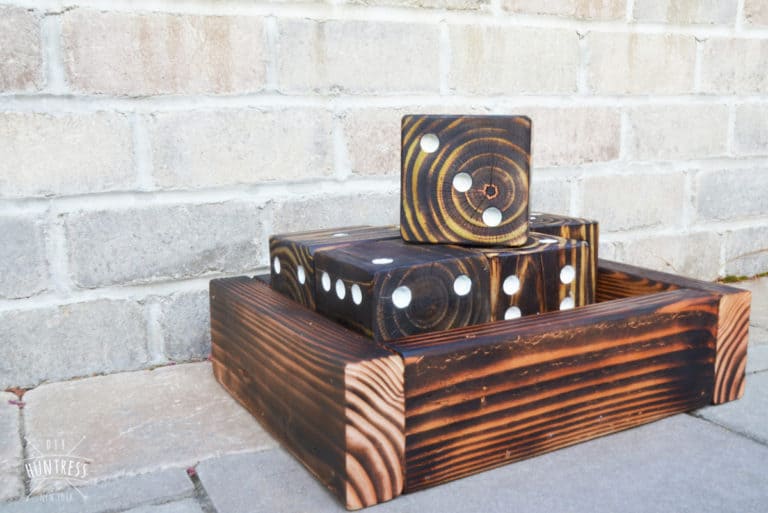
Since my graduation party in May, I’ve gotten lots of requests for a tutorial teaching my readers how to make the lawn dice I shared on Instagram. So, I decided to take things one step further and make a unique set with a storage case since Labor Day weekend is right around the corner! I really couldn’t think of a better way to my spend time with my loved ones than with some outdoor lawn games!
The entire project took a couple of hours to finish and was SO much fun to make! In fact, I’m pretty sure I’m addicted to torching wood now.
Directions
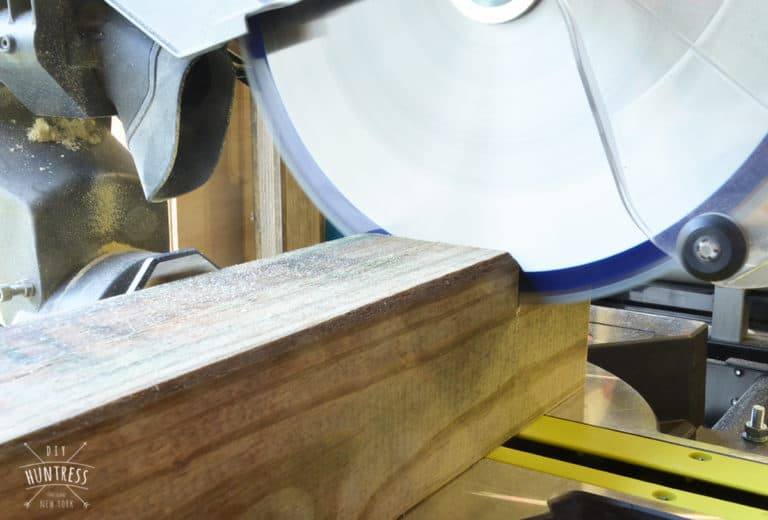
Measure and cut six 3 ½ x 3 ½” cubes from your 1 x 4 x 6′ (actual dimensions, 3 ½ x 3 ½ x 6′).
Print my custom 3 ½ x 3 ½” dice template and use it to find the markings for your drill. Use a sharp object to poke holes in the center of each dot. If these marks are hard to see, you can darken them with a marker.
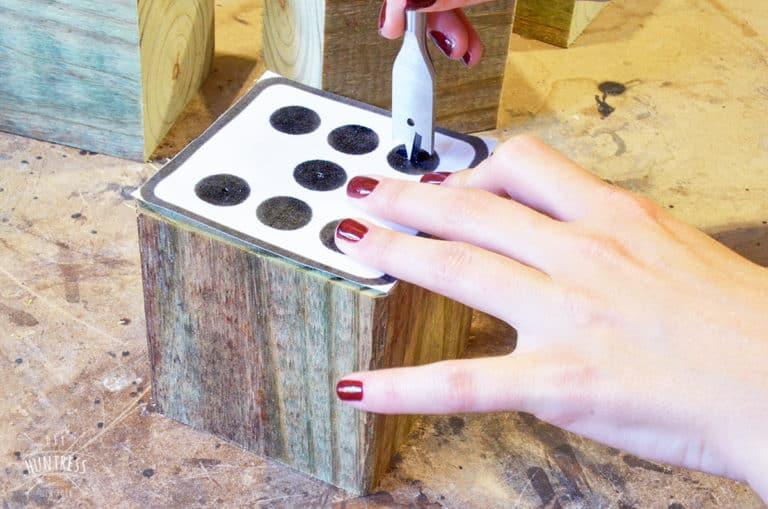
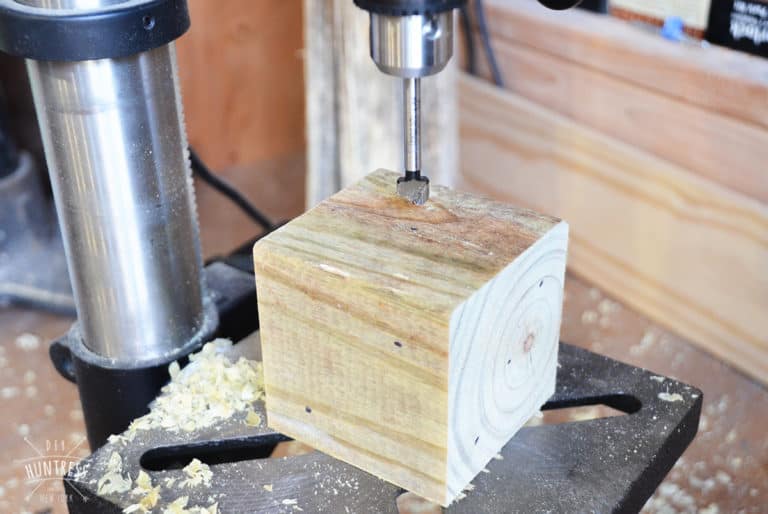
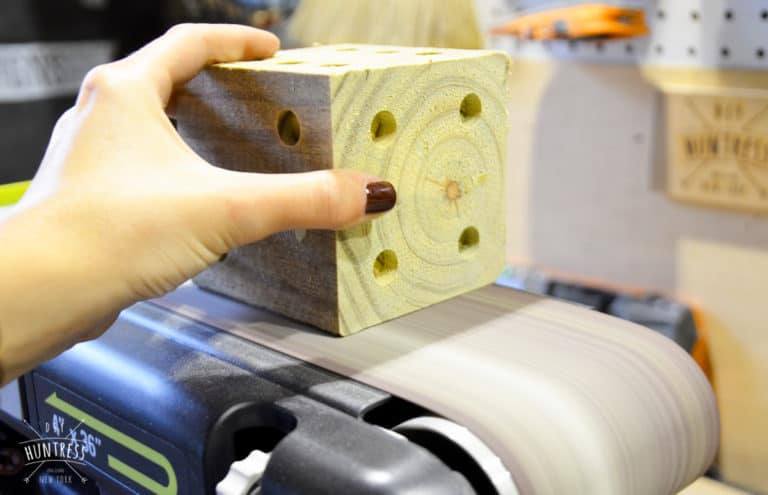
Use a drill press or handheld drill with a ½” forstner bit and drill openings for your dots.
Next, smooth out your dice and round out the edges with a sander.
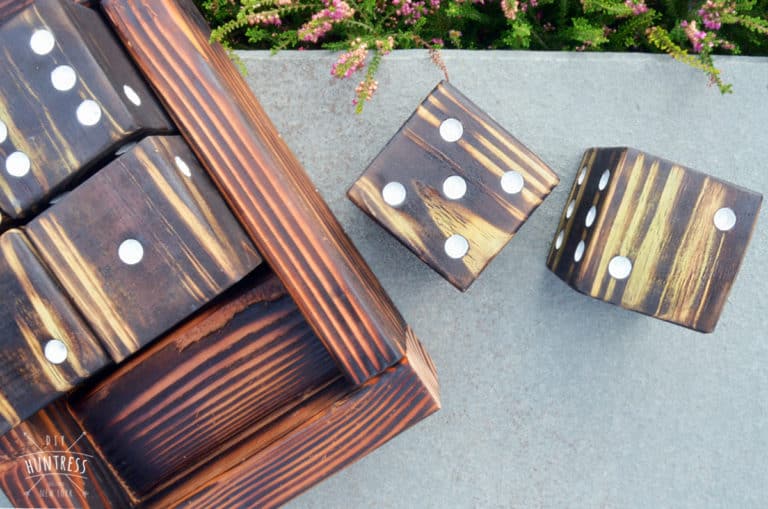
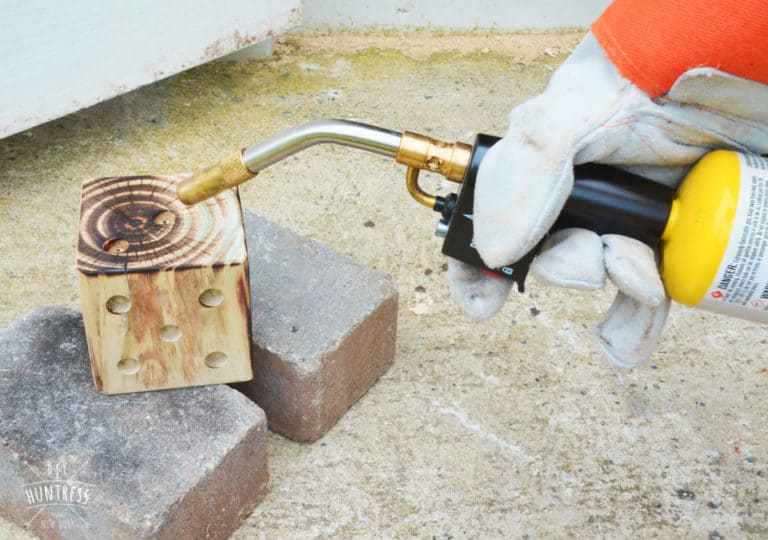
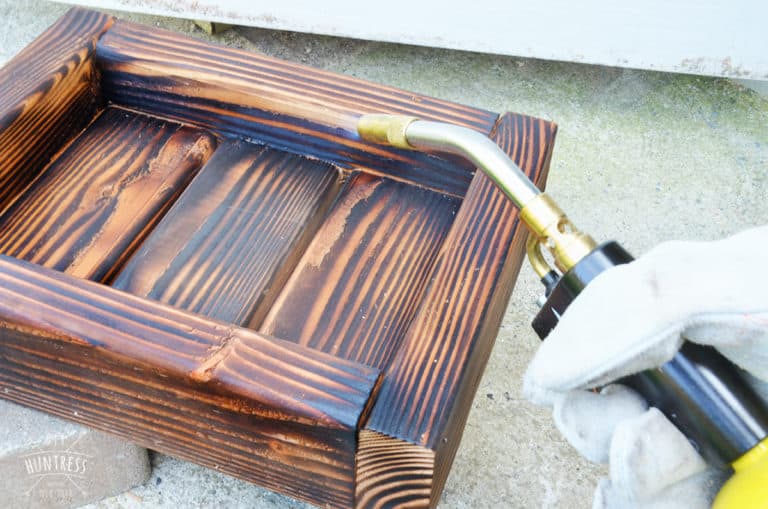
Here comes the fun part! Place your wooden dice on bricks or cinderblocks in a well ventilated area. Use your Bernzomatic TS4000 to torch the surface of the wood. This is so easy! Just make a couple of light passes… and wah-lah!
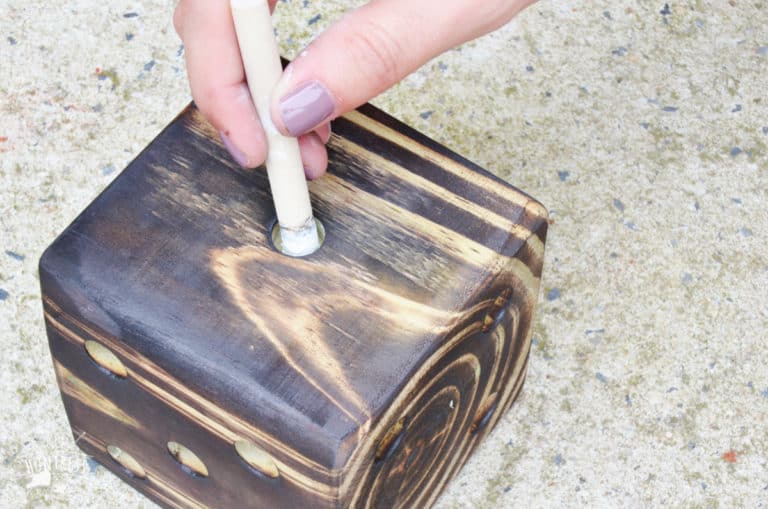
Once torched, use your ½” paint dauber to paint your dice holes with white paint. You can use a slightly damp rag to wipe away any overspill.
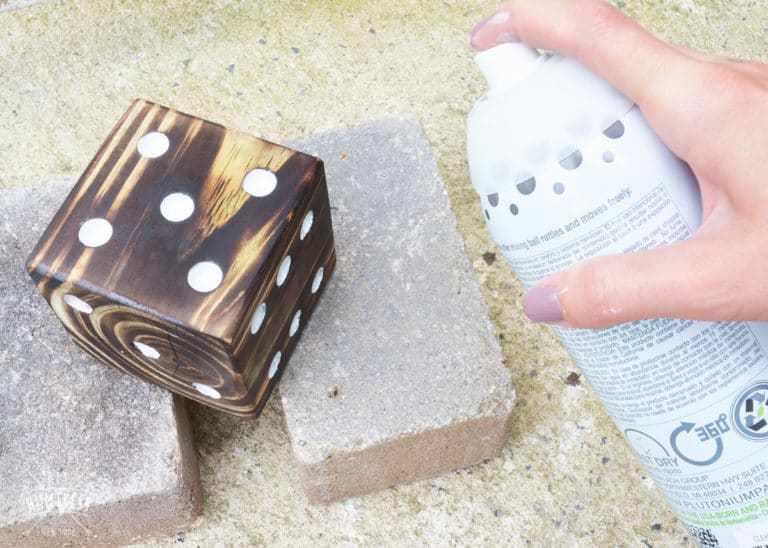
Once the paint dries, use a gloss polyurethane spray to seal your dice.
Create Your Carrying Case!
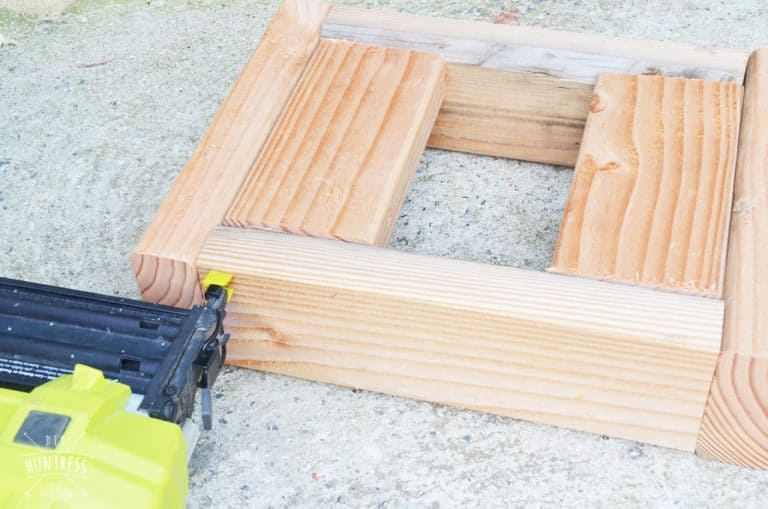
Cut the following pieces from your 2 x 4 x 6′:
(2) 10 ½” Long Sides
(2) 10″ Short Sides
(3) 10″ Bottom Slats
Next, attach all pieces with 2″ brad nails.
Lastly, use the Bernzomatic TS4000 to torch your case the same way as the dice. Spay with polyurethane to finish.
Now get out there and have some fun this Labor Day Weekend!
Now that I’ve been introduced to the world of wood torching, I’m hooked! I can’t wait to continue working with Bernzomatic to create more fun projects with their torches. What do you guys think, will you be trying out wood burning soon!? I sure hope so!